NOW YOU CAN!
ConcealaHook will not rust, corrode or ruin the fascia of your home or
business. After installation,you will be able to easily hang your seasonal
decorations of choice , Halloween, Christmas, Cinco de Mayo, …, When you
take down the decorations ConcealaHook stays in place until the next time
you use it, making the task of decorating much much easier..
Best of all, once you install it,
you will NEVER HAVE TO DO IT AGAIN!!!
•
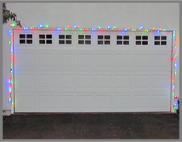
Hanging seasonal decorations on fascia and wood posts such as
Christmas lights.
•
Decorating mantels, doorways, fences, use around windows.
•
Edges of tables to hang purses, hats.
•
Picture frames and objects flush to wood walls.
•
Inside a house or business on any wood surface such as a mantle.
•
Hanging lights in a patio area.
•
Hang outdoor accessories.
•
Holiday decorating for restaurantson any wood surface.
ConcealaHook can also be used in many other great ways:

Eliminate the hassle of hanging unsightly hooks on your
home for seasonal decorations each year?

About Us
The
added
problem
was
that
removing
them
tampered
with
the
integrity
of
the
home
or
building’s
exterior
such
as
holes
and
cracks.
Then
we
either
had
to
patch
them,
causing
MORE
time
and
effort,
or
left
them,
exposing
the
building
structure
to
the
outside
elements.
Then
the
structure
was
at risk of damage by decay, corrosion, and rust, which we knew could be very unsightly.
Yes,
hanging
decorations
is
definitely
a
time-consuming
effort
and
sometimes
left
us
thinking,
“is
it
really
worth
it”
to
have
to
do
this
year
after
year.
We
always
wondered
if
there
was a better way. And there was!
It was at that time that my husband invented
“ConcealaHook”
“It’s not about ideas, It’s about making ideas happen”
-Scott Belsky-

As
property
owners,
we
struggled
for
years
with
the
annual
daunting
task
of
hanging
holiday
decorations
on
our
home
and
business.
While
we
and
our
family
loved
the
end
results,
we
dreaded
the
not-so
easy
process
of
affixing
“the
right”
nails,
staples,
and/or
hooks
to
a
structure,
only
to
later
endure
the
even
more difficult effort to remove them.
Wood-Heavy
Concealahook
is
intended
for
use
in
heavier
weight
applications
such
as
hanging
purses
under
bars,
street
banners,
tools,
ladders,
heavy
wood
style
restaurant
structures
such
as
wood
columns
and post.
[ How to use in Concrete Application]
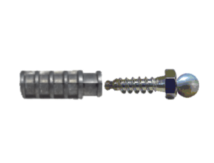
Metal-Heavy
Concealahook
was
design
with
the
same
concept
as
the
Wood-Lite
but
for
metal
in
order
to
meet
a
growing
demand
for
restaurant
clients,
specialy
for
ladies
to
hang
their
purses.
See
gallery
section for a picture of how this is implemented.
[ How to use in Stucco Application]
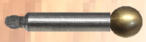
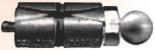
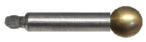
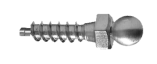
Wood-Ball
Concealahook
is
a
decorative
version
of
Wood-Lite
Concealahookwas
with
a
brass
or
aluminum
½
inch
ball.
It
also
can
be
used
to
hang
light
weigth
items
in
wood
material.
Ideal
for
a
more
flashy
temporary
or
permanent
hanging
way
for
keys,
jewelry,
and
other decorations.
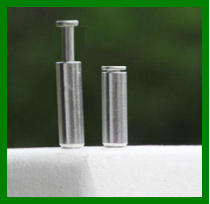
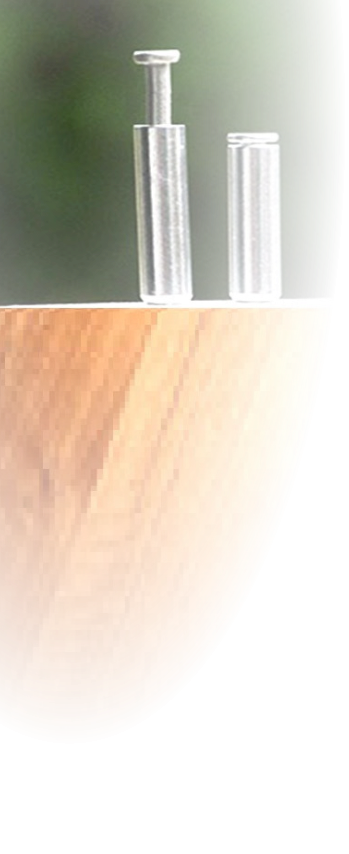
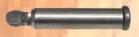
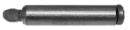
Wood-Lite
Concealahook
was
invented
and
designed
for
hanging
light
weigth
objects
in
wood
material
such
as
soft
pine,
hard
woods,
and
particle
boards
with
a
thickness
⅜
or
greater.
Ideal
for
temporary
decorations
such
Christmas
lights,
Halloween
objects,
sport
banners,
etc.
 DRYWALL (coming soon!) ……………….Photo not available


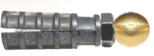
The
CONCRETE
version
of
the
Concealahook
is
a
combination
of
the
Lag
Screw
type
Concealahook
above
and
a
shield
that
is
used
comercially
for
securiting
objects
in
solid
concrete,
brick,
or
stone
application.
This
type
of
hook
is
meant
for
temporary
hanging
of
items
and
then
provding
a
way
to
minimize
exposure
of
the
ball
hook.
Click
CONCRETE
top
of
page
to
see
action
graphics of hook.
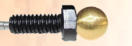
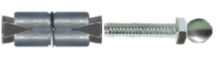
The
STUCCO
version
of
the
Concealahook
is
a
combination
of
the
metal
Concealahook
and
a
comercially
available
3/8
Doulble
Expansion
Anchor.
Once
Installed
the
Ball-Pin
can
be
extended
for
use
and retracted to partially hide.
* 8 to 10 ConcealaHooks will cover 30 linear feet * To match surface color, paint head of hook.
Required Tools
15/64, B, D, or C Drill bit
Drill

Hammer or Mallet
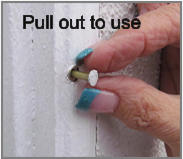
STEP 4.To use, pull out head of hook, push in to conceal.
PASO 4. Para usar retire la cabeza del gancho y enpuje
para dendro para esconder.
STEP 3.Tap, Tap, Tap….until the top ofthe hook is flush
with the wood.
PASO 3. Golpecito, Golpecito….hasta que la cabeza del
gancho este al nivel de la madera.
surface.
STEP 2. Insert beveled end of hook into hole and tap the
head of hook to start installation.
PASO 2. Coloque la punta de el gancho en la entrada del
hoyo y suavemente martillear la cabeza para comenzar la
instalacion.
STEP 1.
Drill a hole using a 15/64 inch (5.95mm) size drill bit to a
depth of 1-1/4 inch. You can also use an B, C, or D drill bit.
PASO 1
.
Con una broca de tamano 15/64 inch (5.95mm) pulgada
taladre un hoyo a la profundidad de 1-1/4 pulgada. Tambien se
puedes usar una broca de tamano B, C, o D.


If
top
of
hook
head
is
flush
with
surface
use
finger
nail
or
small
pointed
object
to
pull
out
but
if
top
of
hook
head
is
even
with
with
surface
use
a
sticky
tape
or glue dot to pull out and use, the pin is floating and is easy to pull out.
Once
started
Tap,
Tap,
Tap
a
few
times
until
bottom
of
head
is
flush
with
wood surface. Exposed pin head will permit pulling hook for use.
Place beveled end of hook and tap in just to get it started.
After
drilling
hole
remove
excess
wood
debris
by
moving
in
and
out
a
few times while drilling hole.